I am doing all kinds of SDL and programmer voodoo, and one such thing I am trying to do is create layered canvases. To do this, I have declared three Textures, Background, Main_Layer and Foreground (I may expand this for any arbitrary number of layers), and I first clear each texture to #00000000, then I render objects to one of those textures using SDL_SetRenderTarget, then render each of those textures to NULL (that is, the default, so that it appears in the window). One problem that I have found is that for whatever reason, it will not display SDL_BLENDMODE_ADD textures correctly anymore.
Everything is set to SDL_BLENDMODE_BLEND (except the additive stuff), of course, and I’m initiating the Renderer with SDL_RENDERER_TARGETTEXTURE as well as each of the three layer textures being designated SDL_TEXTUREACCESS_TARGET. Otherwise we would have much bigger problems.
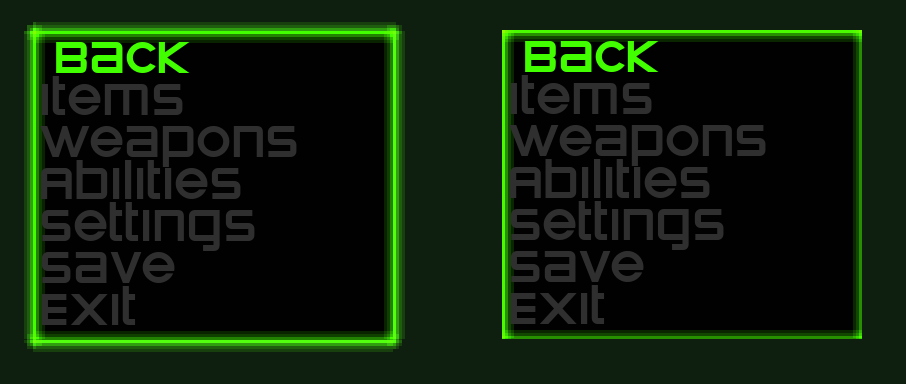
Here’s a screenshot. On the left we have what it’s supposed to look like (and what it does look like if I just render objects to NULL), while the one on the right is what it looks like if I attempt to render to Main_Layer first:
The dark green is the draw color that filled in when I called SDL_RenderClear on NULL. As you can see, it renders the ADD portion (the border) properly inside the box, presumably because the target texture has opaque pixels in that area, while the part outside the box appears to be completely transparent, presumably because the target texture has completely transparent pixels underneath.
I don’t know if sharing my code will be all that helpful since other voodoo I’m engaging in involves Ada language and subroutine accesses, but I can put together an excerpt if it will help.
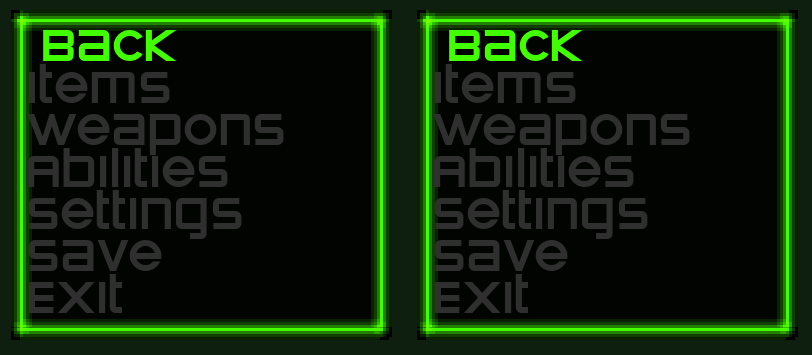
TBH I can’t understand from your description what exact images you’re drawing to make up the final image, but on the left could you be drawing the light green rectangle several times over itself?
According to this, SDL_BLENDMODE_ADD leaves the destination alpha unchanged (dstA = dstA) so if you are initially clearing the destination’s alpha to zero it will still be zero after the render operation. As a result, rendering that texture to the default target in SDL_BLENDMODE_BLEND mode will have no effect (because now the source alpha is zero).
You may be able to use SDL_ComposeCustomBlendMode() to create a blend mode which adds both the color and alpha components.
I think what is happening here is in the first case (simple add scaled by one), the alpha of the image is still 1 (100%), so it still draws the black pixels. I think what is happening in the second case (see the SDL_BlendFactor documentation) is that even using SDL_BLENDFACTOR_SRC_COLOR, the custom blend mode still wants to add the alpha channels together, when again, the alpha is still 1 (100%) even for the black pixels.
I’m wondering if this may be outside the scope of the current SDL release. Or maybe is there some way to load the texture itself so that black is transparent, 0x7F7F7F is 50% alpha, 0xFFFFFF is 100% alpha, etc? I’m sure anything is possible with the magic of RWOps, but hopefully there’s an easier solution.
If you specify one of the alpha blend factors as SDL_BLENDFACTOR_SRC_COLOR it is the alpha component of the source that you’re multiplying by, not the R, G or B component. In other words it’s identical to specifying the factor as SDL_BLENDFACTOR_SRC_ALPHA (see the description of the factors here).
So the effect of your modification is to add alpha² (alpha * alpha) to the destination, not alpha. I expect the reason you don’t see much difference is that alpha² and alpha are identical when alpha is 0.0 or 1.0, which will be the case most of the time. Only on anti-aliased edges will squaring make a subtle difference.
Or maybe is there some way to load the texture itself so that black is transparent, 0x7F7F7F is 50% alpha, 0xFFFFFF is 100% alpha,
Why not just set the alpha values you require in your source image?
Creating a 32-bit bmp and doing a global replace on an opaque color for one with partial transparency might actually be harder than custom processing in SDL… Image processing software–well, software in general, really–is extremely not user friendly. But point taken. I’ll see about doing that.
Thanks!
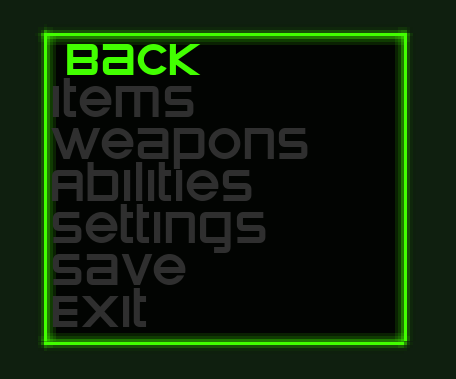
EDIT: Actually, it wasn’t that bad with a little ingenuity. I just did a select all on a color, moved up a layer, filled the selection, then deleted the section on the lower layer, and repeated for each color. The result is better than the last couple of attempts:
I think that will work. I do still need to clean up the code that draws the border but I can manage that myself.
I’m something of a low-level hacker myself, and I would probably have written a little utility to patch the alpha bytes in the BMP file directly! Glad you’ve sorted it anyway.

